
7 Tips for Buying the Right Wheel Hub Assembly

Buying the right Wheel Hub Assembly is more than matching a part number online. It affects steering accuracy, braking performance, tire wear, and driving confidence. A poor choice may look acceptable in a product photo. It can still produce humming, looseness, or uneven braking after installation.

Mike Mavrigian, an automotive technical writer and repair authority, states, “The correct replacement part must match the vehicle and its application.” That principle guides this article. Vehicle year, engine, drivetrain, axle position, and electronic features all matter. Some assemblies include ABS sensors. Others require separate sensors or special mounting hardware. Small differences can create expensive mistakes.

Measure carefully. Check the original assembly. Compare connector shapes, flange dimensions, spline counts, and bearing specifications. Use the vehicle identification number when possible. Do not rely on appearance alone. It misleads.

Brand reputation also deserves attention. Look for precise machining, sealed bearings, corrosion-resistant surfaces, and clear warranty terms. Installation quality matters just as much. A clean knuckle, correct torque, and suitable tools protect the new assembly. Improper tightening can damage a bearing before the vehicle leaves the workshop.

These seven tips cannot remove every uncertainty. Catalog data may contain errors, and older vehicles may have undocumented repairs. That is the uncomfortable part. Recheck the evidence. Ask a qualified technician when details conflict. The safest Wheel Hub Assembly purchase combines verified specifications, dependable manufacturing, and careful installation. Performance should be confirmed on the road, not assumed from a low price.
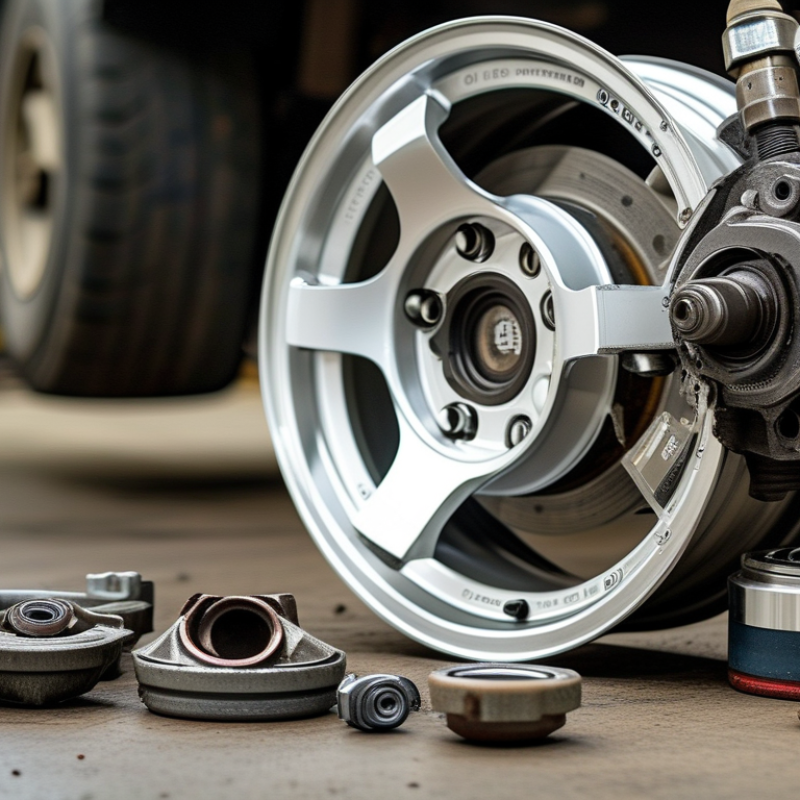
7 Tips for Buying the Right Wheel Hub Assembly

Identify Your Vehicle’s Hub Assembly Requirements

Identify Your Vehicle’s Hub Assembly Requirements

Tip 1

Start with exact vehicle information. Check the model year, engine, drive type, and axle position. A front hub may not match a rear hub, even on the same vehicle. Use the vehicle identification number and compare the original assembly’s dimensions. Measure twice. A small error can create a serious fitment problem.

Tip 2

Confirm the hub’s technical features. Check the bolt pattern, flange design, bearing type, spline count, and sensor connection. Vehicles with anti-lock braking systems often require an integrated speed sensor. The connector must match securely, without stretched wires. Also verify the assembly’s load rating and stud size. These details affect braking stability and wheel alignment.

Tip 3

Inspect the surrounding parts before ordering. Rust around the knuckle can hide damaged mounting surfaces. A worn axle nut, bent flange, or damaged wiring may imitate a hub problem. I once focused on bearing noise and overlooked a loose connector. That mistake changed the repair plan. Use service data, torque specifications, and a careful road-test diagnosis. Do not rely on noise alone. Availability is useful, but correct fitment matters more than quick delivery.

Choose Between OEM and Aftermarket Hub Assemblies

Choosing the right wheel hub assembly often means comparing OEM and aftermarket options carefully. OEM assemblies match the vehicle’s original design and specifications. They usually provide predictable fitment, sensor compatibility, and bearing performance. That consistency matters during installation.

Aftermarket assemblies can offer lower prices and wider availability. However, quality varies between suppliers. Some use strong seals and precise bearing preload, while others may develop noise early. I once trusted a cheap assembly because the packaging looked convincing. The fit was correct, but the ABS sensor failed within months. Appearance is not proof.

Tip: Compare the part number, bolt pattern, spline count, and ABS connector before buying. Check whether the assembly includes studs, sensors, and mounting hardware. A complete unit may save labor and prevent compatibility problems. Ask for testing details, warranty coverage, and technical support. Those details reveal more than a low price.

Tip: Review installation requirements. Use the vehicle-specific torque specification, clean the mounting surface, and avoid striking the bearing directly. After installation, check for wheel play, unusual humming, and warning lights. An OEM part may suit drivers who prioritize factory consistency. A well-tested aftermarket unit may suit buyers managing repair costs. Still, no choice is perfect. I sometimes prefer aftermarket parts, but only after checking fitment data and return terms. A few minutes of doubt can prevent another repair.

Verify Fitment, Specifications, and Compatibility

7 Tips for Buying the Right Wheel Hub Assembly

Verify fitment before comparing prices. A hub assembly may look identical but use different flange dimensions, bolt patterns, bearing loads, or ABS sensor connections. Match the vehicle year, model, engine, drivetrain, axle position, and original equipment number. Check both sides, too. Some applications use different assemblies left and right.

Read the specifications carefully. Confirm the number of mounting holes, wheel stud size, flange offset, bearing type, and sensor design. SAE International’s J2530 standard addresses aftermarket wheel performance and testing, but it does not guarantee vehicle compatibility. That distinction matters. A compliant component can still be wrong for your chassis. Measure the old part when catalog information conflicts.

Use reliable databases and inspect the returned part before installation. NHTSA reported 42,514 U.S. roadway fatalities in 2022. That figure does not identify hub failures, but it shows why small fitment mistakes deserve attention. Spin the bearing by hand. Look for roughness, play, damaged threads, or a bent flange. Confirm the ABS connector reaches without tension. I have seen catalog listings miss mid-year changes. Recheck the vehicle identification number and production date. It takes minutes. An overlooked sensor mismatch can trigger warning lights, poor wheel-speed readings, or extra labor.

Compare Bearing Quality, Materials, and Warranty Coverage

7 Tips for Buying the Right Wheel Hub Assembly

A 2024 S&P Global Mobility report places the average U.S. vehicle age at 12.6 years. Older vehicles need careful hub selection. Check the bearing’s dynamic load rating against the original equipment specification. ISO 281 explains how rating life is calculated under controlled loads. Do not treat a higher number as automatic proof of quality. Compare seal design, internal clearance, and grease temperature limits. Look for double-lip seals when roads regularly carry water, salt, or fine dust.

Inspect the material details. Properly hardened bearing steel resists fatigue and pitting. The hub flange should also show consistent machining, not rough edges or uneven coating. Ask whether the encoder ring supports the vehicle’s existing wheel-speed sensor. A small mismatch can trigger an ABS warning. It happened during one installation I reviewed. The part fitted physically, but its sensor signal was wrong. That mistake cost more than the original price difference.

Read the warranty line by line. Compare coverage length, mileage limits, labor reimbursement, return shipping, and transfer rules. The 2023 Automotive Aftermarket Suppliers Association report describes a large, aging replacement-parts market, making warranty clarity increasingly important. Check whether corrosion, installation errors, and damaged connectors are excluded. Keep the invoice and installation record. A long warranty sounds reassuring. It may not cover the failure you actually experience. Compare technical evidence, materials, and support together.

Inspect Installation Needs and Assess Overall Value

Choosing the right wheel hub assembly involves more than matching a vehicle model and year. Inspect the installation requirements before ordering. Check the spline count, bolt pattern, flange shape, and sensor connection. A small connector difference can stop installation completely.

Look at the repair area under real conditions. Rust around the knuckle may require penetrating fluid, a slide hammer, or extra labor. Confirm whether the assembly includes studs, seals, mounting hardware, and an integrated speed sensor. These details affect both time and cost. I have seen repairs delayed because one necessary bolt was missing. It was a simple oversight, but not a cheap one.

Assess overall value through more than the purchase price. Compare bearing materials, sealing quality, load ratings, warranty terms, and technical support. Use the vehicle service manual for torque specifications, because guessing can damage the bearing or loosen the fastener. After installation, check sensor wiring for rubbing and scan for fault codes. A short road test can reveal humming, vibration, or an uneven brake response. I once focused too heavily on a low price and overlooked corrosion protection. That decision needed rethinking. The cheapest assembly may become expensive when removal, replacement, and lost driving time are included. Practical value means reliable fitment, controlled installation, and predictable service life.

WhatsApp